Have you ever wondered if you could press flowers simply using items in your home? Here is a quick guide to get your started!
The art of preserving flowers is a skill that takes hours of practice and persistence. But getting started is the first step to finding a therapeutic addiction!
This delicate process is worth every second of time and energy as it has the potential to preserve sentimental flowers from any occasion.
Pressed flowers can be used in a myriad of creative projects; serving as embellishments in scrapbooking, personalised gifts, pressed wedding bouquets, home decor, and even in the crafting of handmade jewellery.
Everyone loves the charm of pressed flowers!
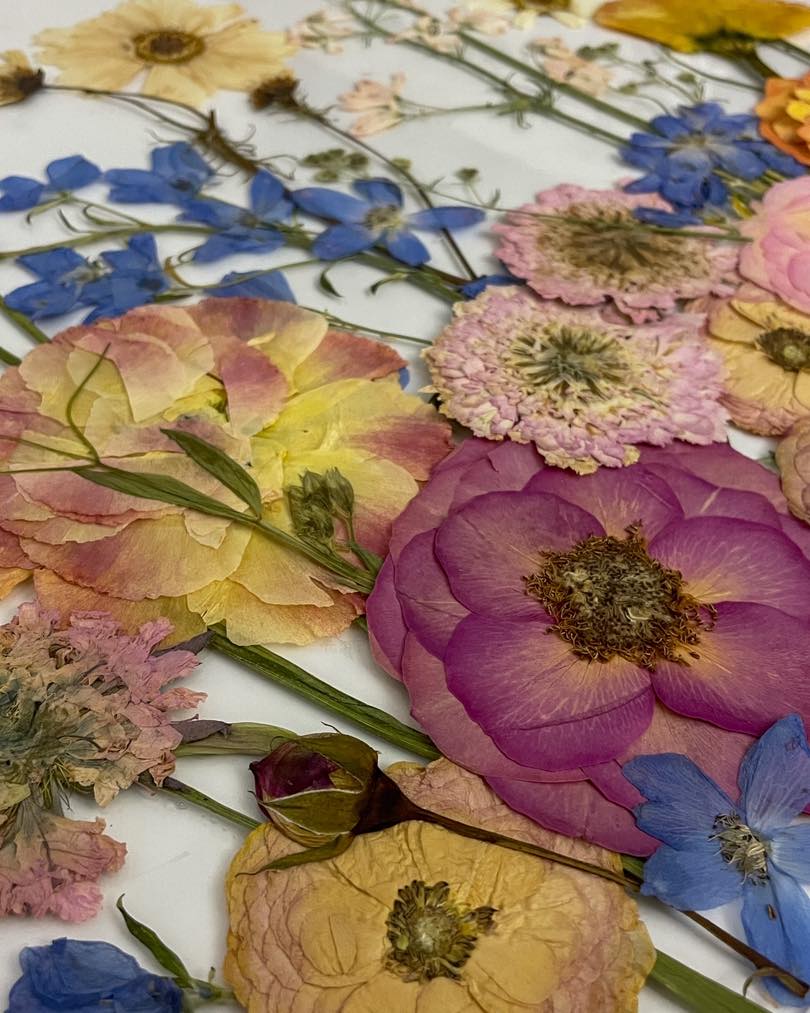
Choosing the Right Flowers

When selecting flowers for pressing, aim for blooms that are naturally flat and have vivid colours so they are less likely to fade.
Flowers with a single layer of petals such as pansies, violas, and cosmos are some of my favourites to recommend beginning with.
Consider also the shape and size of the flower; some may require disassembly into smaller parts to press effectively.
Trumpet-shaped flowers often don’t press well or look that good 2D. It's also crucial to choose flowers at the right stage of blooming—fully bloomed flowers may lose petals during the pressing process, while buds may not open fully or display their full colour range.
Roses either need to be thinned down to a few petals or petals pulled off and individually pressed.
Preparing Your Flowers for Pressing
Before you begin the pressing process, it's essential to prepare your flowers to ensure they retain their beauty and colour.
Start by gently cleaning any dirt or debris from the petals and leaves using a soft brush or a piece of cloth. Be careful not to bruise or damage the flowers. If you are picking flowers pick them later in the afternoon or at least when they are no longer dewy, as wet flowers may rot or mould during the pressing process.
Arranging your flowers is a crucial step to obtain a good result. Place them on the pressing surface, ensuring there's enough space between each flower to prevent overlap, which could lead to uneven pressing or colour transfer.
Consider how you may use the flowers and try laying them out in a way that showcases their best angle. Some flowers may look better pressed from the side to preserve their shape, while others may need to be pressed face down.
Methods of Pressing Flowers

Pressing flowers in a heavy book
-
Select a heavy book – Choose a book that you don’t mind possibly getting a bit of moisture or flower pigment on, such as a phone book, dictionary, or encyclopedia and make sure it doesn’t have glossy paper.
-
Prepare your flowers – Before placing the flowers in the book, position your flowers between two pieces of paper to protect the pages. This also helps absorb moisture, speeding up the drying process. Parchment or wax paper is not recommended for pressing flowers as it won’t absorb moisture.
-
Placement in book – Open your chosen book to its middle and lay the flowers flat between the sheets of paper. If pressing multiple flowers, ensure there’s enough space between each to prevent overlap or sticking.
-
Weighing it down – Close the book gently on the flowers, then stack additional heavy books on top for more pressure. This helps flatten the flowers more effectively.
-
Waiting period – Leave the setup undisturbed for 3-4 weeks. The exact time will depend on the moisture content and thickness of the flowers. It's best to check in occasionally during the first week to see how they're doing. If you have some flowers that have more moisture to start with, put the flowers between several pieces of paper and change the pages not touching the flowers for the first few days.
-
Checking your flowers – After 3-4 weeks, carefully open the book and remove the papers to check on the flowers. They should feel dry and papery to the touch.
Pros of this method:
-
Accessibility: This method doesn’t require any special equipment beyond what you likely already have at home.
-
Simplicity: It’s straightforward, making it ideal for beginners.
-
Cost-effective: Utilising heavy books is an inexpensive way to press flowers. You can even grab some old books from an op shop!
Cons of this method:
-
Time: It can take several weeks for the flowers to fully dry and press.
-
Risk of damage: There’s a slight risk of damaging the book pages with moisture or colour transfer from the flowers.
-
Limited size: The size of the flowers you can press is constrained by the size of the book.
Using a Microwave for Quick Pressing
For those looking to speed up the flower-pressing process, a microwave can be an effective tool. This method significantly reduces the waiting time, making it possible to press flowers in just a matter of minutes.
However, it requires caution and proper technique to avoid overheating and potentially ruining the flowers.
-
Prepare your flowers as you would for traditional pressing, ensuring they are clean and dry.
-
Position the flowers between two pieces of cotton material (I use a cut up old pillow case) and some felt on either side. This helps absorb moisture during the microwaving process.
-
Use a microwave-safe plate as your base and place the prepared flowers on top of the plate.
-
Add weight by placing another microwave-safe plate or a microwaveable flat object on top of the flowers to press them down.
-
Microwave in short bursts, starting with 20 seconds, then checking the flowers. Continue with 10-20 second intervals until the flowers are dry. The total time will vary depending on the flower type and moisture content. It is recommended to wipe moisture off the plates and let flowers cool a little between microwave bursts. If you find you are burning flowers try microwaving for shorter periods of time.
-
Allow the flowers to cool before removing them from the cotton. They should feel dry and papery to the touch.
Pros of this method:
-
Speed: This is one of the fastest methods to press and dry flowers.
-
Convenience: Nearly everyone has access to a microwave, making this method very accessible.
Cons of this method:
-
Risk of overheating: There’s a high risk of burning the flowers if microwaved for too long.
-
Learning curve: It might take a few attempts to get the timing right for different types of flowers.
-
Equipment: Requires microwave-safe materials and sometimes trial and error to find the right weight and drying time.
Removing and Storing Pressed Flowers
Once your flowers have been successfully pressed and are completely dry, it's essential to handle them with care to prevent any damage. Gently lift the flowers from the paper but avoid touching the petals as much as possible. Place them on an A4 sheet of paper.
For storage, place the pressed flowers on the A4 sheets of paper between pieces of cardboard and store in a dry, dark place to maintain their color and shape. If you live in a humid location, place these in a zip lock bag with a desiccant satchel.
Keeping dried flowers away from direct sunlight and moisture will ensure the flowers remain vibrant and intact for a long time.
How to use your pressed flowers

Here are some creative ideas for using pressed flowers:
-
Bookmarks: Create personalised bookmarks by laminating pressed flowers. This can be a simple yet thoughtful gift for the book lovers in your life.
-
Resin Jewellery: Embedding pressed flowers in resin allows you to make stunning pieces of jewellery, such as pendants, earrings, or bracelets. Each piece is truly one-of-a-kind.
-
Framed Art: Arrange pressed flowers on a canvas or within a photo frame to create delicate and appealing floral artwork for your home.
-
Personal Stationery: Adding pressed flowers to personal stationery, like thank-you cards, birthday greetings or gift tags, gives them a unique and special touch.
-
Wedding Invitations: For a romantic and natural feel, incorporate pressed flowers into wedding invitations, place cards, or other wedding-related decor.
Pressing flowers is a wonderful way to enjoy nature and embrace your creative side! When I started pressing flowers, I began to notice botanicals so much more and began to wonder how I could preserve them!
So, these are a few tips to get you started but ultimately the best way to learn is to choose a method and have a play. The worst thing that can happen? A few flowers may go brown…or worse a little mouldy or get burnt.
My personal favourite is using a traditional press and taking it all slow!